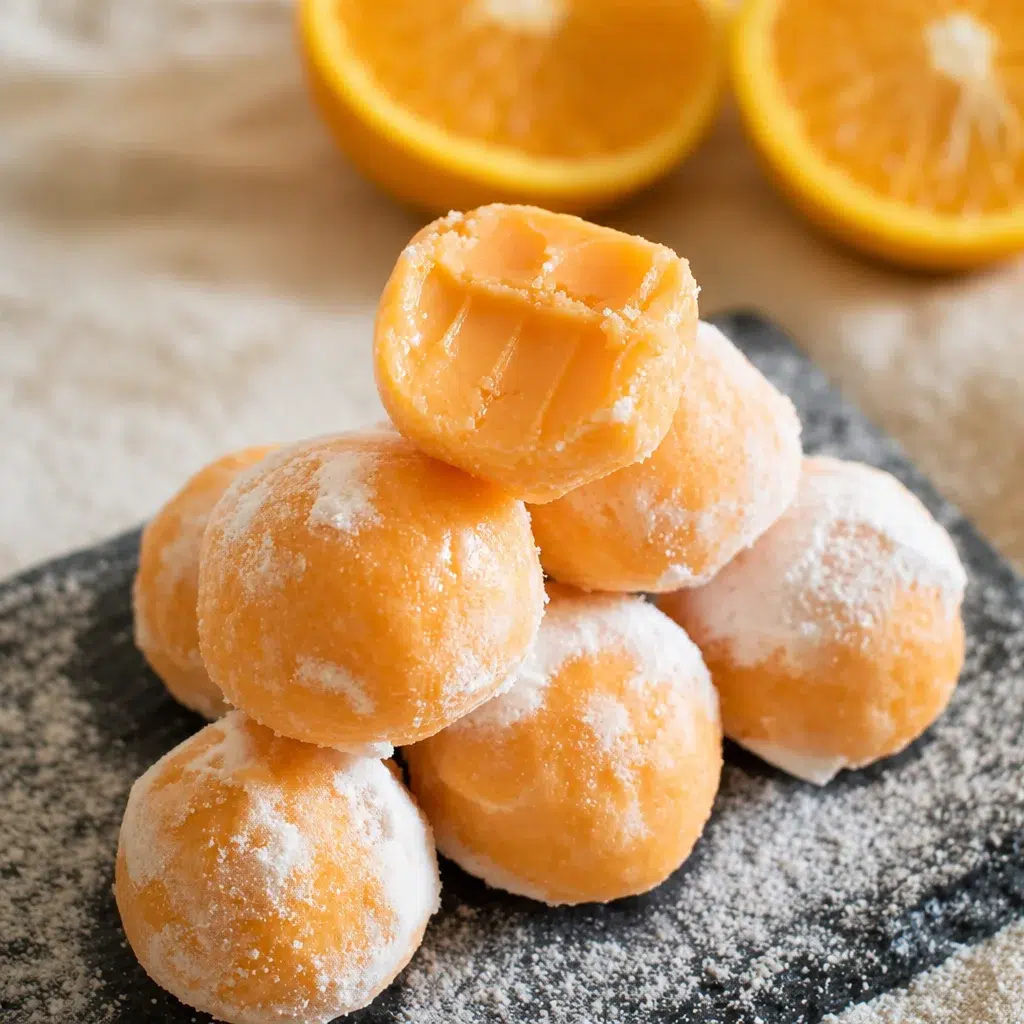
Orange Creamsicle Truffles are my go to move when I need something sweet, cute, and basically impossible to mess up. You know those days when you want a dessert that feels special, but you do not want to turn on the oven or wash a mountain of dishes? Same. These little bites taste like that nostalgic orange and vanilla combo from childhood, but in a rich truffle form. They are cold, creamy, and just bright enough to feel refreshing. If you are bringing dessert to a party, these are the ones that disappear first.
Table of Contents
Why You’ll Love This Orange Creamsicle Truffles Recipe
This recipe is only 5 ingredients, it is totally no bake, and it comes together fast. The texture hits that perfect spot between creamy and fudge like, especially after they chill. I also love that it is easy to make them look fancy even if you are not the “perfect pastry person.”
Another big reason I keep coming back to Orange Creamsicle Truffles is how flexible they are. You can keep them simple with a white chocolate coating, or dress them up for holidays with sprinkles and drizzles. And if you are already in an orange dessert mood, you would probably love my favorite slice and serve option too, this Irresistible Orange Creamsicle Cake is a total crowd pleaser.
Orange Creamsicle Truffles Ingredients
Here is the simple lineup. Nothing weird, nothing hard to find, and yes it is really only five ingredients.
- Vanilla sandwich cookies (like Golden Oreos)
- Cream cheese softened
- Orange zest for real fresh flavor
- White chocolate or white candy melts for coating
- Orange extract (optional but it really boosts the creamsicle vibe)
I like using fresh zest because it gives that “just peeled an orange” smell when you open the container. If you have ever had a fake orange candy that tastes a little too perfume like, zest helps avoid that problem.
Ingredient Substitutions and Swaps
If you need to adjust based on what is in your kitchen, you have options.
Cookies: Vanilla sandwich cookies are the classic base, but vanilla wafers also work. If you use wafers, you may need a tiny bit more cream cheese so the mixture holds together.
Cream cheese: Full fat gives the best texture. Low fat can work, but the truffles might be a little softer. I do not recommend whipped cream cheese because it can make the center too loose.
Orange flavor: No orange extract? Use extra zest. You can also add a little orange juice powder if you have it, but do not add fresh orange juice because it can make the mixture wet and messy.
Coating: White chocolate chips taste great, but candy melts are easier and smoother for beginners. If you are in a baking mood later, bookmark this soft and snacky Deliciously Moist Orange Loaf Cake because it is perfect with coffee.
Essential Kitchen Tools for Making Truffles
You do not need much, and you definitely do not need a fancy truffle scoop. Here is what helps:
Food processor for turning cookies into fine crumbs. If you do not have one, a zip top bag and rolling pin works, but it takes more effort.
Mixing bowl and a spoon or hand mixer to combine everything smoothly.
Small cookie scoop if you want evenly sized balls, but a tablespoon works too.
Baking sheet and parchment paper for chilling and dipping.
Microwave safe bowl for melting the coating.
Step-by-Step Instructions for Orange Creamsicle Truffles
This is the part where you realize how easy these are and then you start thinking about making a double batch. Here is my simple method.
1) Crush the cookies into fine crumbs. You want them pretty sandy, not chunky.
2) Mix the crumbs with softened cream cheese, orange zest, and orange extract. Stir until it looks like a thick dough and you cannot see streaks of cream cheese.
3) Scoop and roll into balls. Place them on a parchment lined pan.
4) Chill for at least 30 to 45 minutes, until they feel firm. This makes dipping so much easier.
5) Dip in melted white chocolate, let excess drip off, then set back on parchment to harden.
That is it. Orange Creamsicle Truffles are basically a “mix, roll, dip, chill” situation, which is exactly my kind of dessert day.
How to Melt White Chocolate Without Seizing
White chocolate can be a little dramatic. The biggest enemy is water. Even one tiny drop can make it seize and turn grainy.
My safest approach is the microwave in short bursts. Add your white chocolate or melts to a clean, completely dry bowl. Microwave for 20 seconds, stir, then repeat until it is almost melted. Stir again and let the leftover heat finish it. If you blast it too long, it can scorch and get thick.
If it feels too thick for dipping, stir in a little coconut oil or vegetable shortening, about half a teaspoon at a time, until it is smooth.
How to Shape and Form Perfect Truffle Balls
If your hands get sticky, you are not doing anything wrong. The mixture warms up fast.
Here is what helps:
Chill the dough for 10 minutes before rolling if your kitchen is warm.
Roll quickly, then place the ball right back on the tray.
If they start getting soft, pop the tray back into the fridge for 10 minutes and continue.
Using a small cookie scoop makes everything more even, and even truffles look more “bakery style” on a plate.
Best Coating Options for Creamsicle Truffles
White chocolate is the classic and it gives that creamy vanilla outside that screams creamsicle. But you can play around.
My favorites:
White chocolate with a little extra orange zest sprinkled on top while wet.
Orange sugar</b (mix sugar with zest and let it sit a bit) sprinkled before the coating sets.
Crushed vanilla cookies for a soft crunchy look.
Sprinkles for birthdays or summer parties.
For dipping, I use a fork, tap it gently on the bowl edge, then slide the truffle off with a toothpick. It is not fancy, but it works.
Flavor Variations and Creative Twists
If you want to keep the same base idea but switch it up, here are a few fun spins:
Add a tiny pinch of salt to the filling. It makes the orange pop more.
Mix in mini chocolate chips for an orange and chocolate vibe.
Do a drizzle of melted dark chocolate over the white coating for contrast.
Swap orange extract for lemon extract and do lemon zest for a bright lemon cream version.
Turn them into a holiday version by adding red and green sprinkles, or pastel sprinkles for spring. I love how Orange Creamsicle Truffles can look totally different just based on the topping.
No-Bake Dessert Tips for Perfect Texture
The texture is everything here. You want the centers creamy, but not mushy.
Soften cream cheese, but do not melt it. If it is too warm and runny, the mixture gets loose.
Crush cookies finely. Big chunks can make rolling harder and the truffles can crack.
Chill before dipping. This is the biggest tip. Cold truffles dip cleanly and hold their shape.
Let them set fully after dipping. I usually let them sit at room temp for 10 minutes, then refrigerate so the coating firms up nicely.
Common Mistakes to Avoid When Making Truffles
I have made all of these mistakes at least once, so learn from my chaos.
Not chilling long enough and then the truffles fall apart in the coating.
Overheating the white chocolate so it gets thick and clumpy.
Adding liquid like orange juice to the filling. It can make everything too soft.
Skipping parchment paper and then the truffles stick to the tray. It is annoying.
Also, taste the mixture before rolling. Some oranges are stronger than others, and you might want a touch more zest or extract.
How to Store and Freeze Orange Creamsicle Truffles
These store really well, which is another reason I love them for parties.
Refrigerator: Keep them in an airtight container for up to 5 to 7 days. I like to separate layers with parchment so the tops stay pretty.
Freezer: Freeze in a single layer until solid, then transfer to a freezer bag or container. They keep about 2 months. Thaw in the fridge overnight for best texture.
If you are gifting them, I recommend keeping them chilled until you are ready to hand them off.
Serving Ideas and Presentation Tips
If you want these to look extra cute with basically no effort, presentation does the heavy lifting.
Serve Orange Creamsicle Truffles on a white platter with a little orange zest scattered around the edges. It looks bright and intentional.
Put each truffle in a mini paper candy cup for that bakery feel.
For parties, I like to do a mix of toppings so the tray looks fun, some with sprinkles, some with cookie crumbs, some with a drizzle.
You can also pair them with a simple orange dessert table. If you want another orange showstopper, I will link it again because it is that good: Irresistible Orange Creamsicle Cake. And if you are more of a quick slice with tea person, here is that cozy loaf again: Deliciously Moist Orange Loaf Cake.
Common Questions
Can I make these Orange Creamsicle Truffles ahead of time?
Yes, absolutely. I actually think they are better after a night in the fridge because the flavor settles in.
Do I have to use orange extract?
No, but it helps a lot. If you skip it, add more zest to keep the orange flavor strong.
Why is my mixture too sticky to roll?
Your cream cheese may be too warm or you need more cookie crumbs. Chill the bowl for 10 minutes, then try again.
What is the easiest coating for beginners?
White candy melts are the most forgiving. They melt smoothly and set quickly without much fuss.
Can I use milk or dark chocolate instead?
You can, but it changes the creamsicle vibe. White chocolate gives that classic vanilla ice cream feel that makes these taste like the real thing.
A Sweet Little Send Off
If you need a bright, no bake dessert that feels fun and nostalgic, Orange Creamsicle Truffles really deliver. Keep the ingredients simple, chill the centers well, and take your time melting the white chocolate so it stays smooth. Once you make them once, you will start thinking of all the topping ideas you want to try next. If you want to compare versions, I also like checking out Orange Creamsicle Truffles – Cooking Classy and this one from Lizzy T with dipping tips, Orange Creamsicle Truffles Recipe {White Chocolate Dipped Candy}. Go make a batch, stash a few in the fridge for yourself, and tell me what topping you picked.
Print
Orange Creamsicle Truffles
- Total Time: 45 minutes
- Yield: 12 truffles
Description
Delicious no-bake truffles that combine the nostalgic flavors of orange and vanilla in a creamy, rich bite-sized treat.
Ingredients
For the truffles
- 14 cookies Vanilla sandwich cookies (like Golden Oreos) (Alternatively, vanilla wafers can be used.)
- 8 oz Cream cheese, softened (Full fat for best texture.)
- 1 tbsp Orange zest (Fresh is recommended for maximum flavor.)
- 8 oz White chocolate or white candy melts for coating (Candy melts are easier for beginners.)
- 1 tsp Orange extract (Optional, but boosts flavor.)
Instructions
Preparation
- Crush the cookies into fine crumbs until sandy.
- Mix the crumbs with softened cream cheese, orange zest, and orange extract until a thick dough forms.
- Scoop and roll into balls, placing them on a parchment-lined pan.
Chilling
- Chill the truffle balls for at least 30 to 45 minutes until firm.
Coating
- Dip the chilled truffles in melted white chocolate, letting the excess drip off, and set back on the parchment to harden.
Notes
You can vary the toppings with sprinkles, extra orange zest, or crushed cookies. These truffles can be made ahead and stored in the fridge for up to a week or frozen for two months. Always ensure to chill the truffles for easy dipping.
- Prep Time: 15 minutes
- Category: Dessert, Snack
- Cuisine: American


