Japanese Egg Sandwich (Tamago Sando) is one of those snacks I crave the second I think about Japan or, honestly, the moment I walk into any convenience store and spot that perfectly wrapped triangle. If you have ever tried the 7-Eleven version, you know what I mean: soft bread, fluffy eggs, and that creamy filling that somehow tastes clean and rich at the same time. The problem is, most homemade egg salad sandwiches come out chunky, too tangy, or kind of watery. This post is my go to method for making that smooth, dreamy convenience store style sandwich at home without stress. You do not need fancy tools, just a few smart steps and good ingredients.
Table of Contents
Why You’ll Love This Authentic Tamago Sando Recipe
This is the kind of sandwich that feels like a little treat, even if you are eating it in sweatpants at your kitchen counter. The texture is the biggest reason. When it is done right, the filling is creamy, fluffy, and not overloaded with crunchy add ins.
I also love that it is reliable. Once you nail the egg cooking and the mixing, you can make it the same way every time. And it is gentle on the stomach, which is why I make it on busy days when I want something comforting but still filling.
If you are into easy egg breakfasts, you might also like this cozy baked egg idea I make on weekends: baked cottage cheese eggs. Totally different vibe, but still that satisfying egg comfort.
Ingredients for the Best Japanese Egg Sandwich
Here is the simple grocery list. The magic is not in having a million ingredients, it is in using the right ones and handling them gently.
- Eggs (large, 4 to 6 depending on how many sandwiches you want)
- Kewpie mayo (or the best mayo you have)
- Salt
- White pepper or black pepper (white pepper feels more classic)
- Sugar (just a pinch, optional but very 7-Eleven like)
- Soft white bread (shokupan if possible)
- Butter (softened, optional but I love it)
That is it. No celery. No onion. No pickles. This is not that kind of egg salad, and that is why it tastes so smooth.
Also, if you are building a lunchbox spread, bookmark this for later: best mini sandwich lunchbox ideas. Tamago sando fits right into that lineup.
Choosing the Right Bread: Shokupan vs Regular Sandwich Bread
Let us talk bread because it matters more than people think. Shokupan is that Japanese milk bread that is extra soft, slightly sweet, and kind of pillowy. It squishes without tearing, which is exactly what you want for a neat, tidy sandwich.
If you cannot find shokupan, use the softest white sandwich bread you can. Avoid anything “extra hearty” or full of seeds. Tamago sando is all about a gentle bite.
My personal tip: lightly butter the bread. It adds flavor and also helps keep the bread from getting soggy if you are packing it to go.
How to Make Perfect Boiled Eggs for Tamago Sando
Egg texture is basically the whole game here. For the classic Japanese Egg Sandwich (Tamago Sando) style, you want yolks that are cooked through but still moist, not chalky and dry.
My no stress boiling method
Put your eggs in a pot and cover with cold water by about an inch. Bring it to a gentle boil, then lower the heat so it does not go wild and splash everywhere. Simmer for about 10 to 11 minutes for a fully set yolk that still mashes smoothly.
As soon as the timer goes off, move the eggs into a bowl of ice water for at least 5 minutes. This stops the cooking and makes peeling easier.
If you hate peeling eggs, here is a little reality check: fresher eggs are harder to peel. If you can, use eggs that have been in your fridge for a week. They behave better.
Step-by-Step Japanese Egg Sandwich Recipe
This is the part where it all comes together. I make this when I want something quick but still feel like I “made a nice lunch.”
Directions
- Peel the cooled eggs and pat them dry.
- Separate yolks from whites. Put yolks in a bowl first.
- Mash yolks until smooth, then mix in Kewpie mayo, salt, pepper, and a pinch of sugar.
- Finely chop the egg whites or mash them gently with a fork, then fold them into the yolk mixture.
- Spread butter on bread (optional but recommended).
- Add a thick, even layer of egg filling.
- Top with the other slice, press lightly, and chill 10 minutes if you want super clean slices.
- Trim crusts if you want the true convenience store look, then cut in half.
This is your Best Tamago Sando Recipe moment. Do not rush the mixing. The smoother the yolk base, the more that filling tastes like it came from a Japanese convenience store fridge.
Secret Tips for a Creamy and Fluffy Egg Salad Texture
If your egg salad usually turns out chunky or wet, these little tricks help a lot.
Tip 1: Mash yolks first, always. Yolks are what make the filling creamy. If you mash everything together at once, it is harder to get that smooth texture.
Tip 2: Go easy on the mayo. Start with less than you think. You can always add more, but you cannot take it out once the mixture is soupy.
Tip 3: Chop whites smaller than you think. Big pieces of egg white make it taste like a regular egg salad sandwich. Tiny pieces melt into the filling and give that signature tamago sando vibe.
Tip 4: Chill the filling for 10 to 15 minutes. It thickens slightly and spreads better. Also, cold tamago sando just tastes right.
When I am in an egg mood, I rotate this sandwich with other easy options like this comforting skillet style dish: cheesy potato egg scramble.
Kewpie Mayo vs Regular Mayo: What Makes It Authentic?
Kewpie mayo is one of the reasons the Best Tamago Sando Recipe tastes like Japan. It is richer and a little sweeter, and it has a subtle tang that feels different from standard American mayo.
Why? Kewpie uses egg yolks instead of whole eggs, and it often tastes more silky. If you can find it, grab it. If you cannot, use a good quality mayo and add:
Just a tiny pinch of sugar and a tiny splash of rice vinegar or lemon juice. Not enough to make it sour, just enough to brighten it.
This is also where you can adjust the salt. Taste the filling before you build the sandwich. That one quick taste saves the whole batch.
Common Mistakes to Avoid When Making Tamago Sando
I have made all of these mistakes so you do not have to.
Overcooking the eggs. Dry yolks equal dry filling. Aim for cooked but still moist.
Using crusty bread. This sandwich is supposed to be soft. Save the artisan loaf for something else.
Adding crunchy mix ins. Celery is great, just not here. Tamago sando is meant to be smooth.
Making the filling too runny. Add mayo slowly. Also, make sure your eggs are cooled and not steaming when you mix, because heat can loosen the texture.
Skipping the chill. Even 10 minutes in the fridge helps the sandwich slice cleanly and taste more like the 7-Eleven style.
Variations of Japanese Egg Sandwich Recipes
Once you learn the base, you can play a little while still keeping it “tamago sando” at heart.
Soft boiled version: Cook eggs a little less so the yolk is slightly jammy, then be gentle mixing. It gets richer and messier in a good way.
Extra protein: Add a spoonful of cottage cheese or Greek yogurt, but go light so you do not change the flavor too much.
Spicy twist: A tiny dab of Japanese mustard or a pinch of chili powder gives a quiet heat.
Fancy convenience store vibe: Add a super thin slice of cucumber for crunch, but keep it minimal.
If you are a sandwich person in general, you might also want something more savory and melty on another day like this: best BBQ chicken grilled cheese sandwich recipe.
What to Serve with Japanese Egg Sandwiches
This is where you can keep it simple or make it a whole little café tray at home.
Easy serving ideas
- Potato chips or lightly salted kettle chips
- A small green salad with a simple dressing
- Miso soup if you want the full comfort meal
- Fresh fruit like orange slices or strawberries
- Iced coffee, milk tea, or even a plain sparkling water
If I am packing this for a picnic, I wrap it tightly and bring something crunchy on the side. The contrast is so good.
How to Store and Meal Prep Tamago Sando
This sandwich is best the day you make it, but you can still prep it smartly.
Make ahead filling: You can make the egg mixture up to 2 days ahead and keep it in an airtight container in the fridge. Give it a quick stir before using.
Assembled sandwich: If you assemble it, wrap it tightly in plastic wrap and refrigerate. It holds up for about 24 hours. Buttering the bread helps a lot with moisture.
Do not freeze it. Mayo based fillings get weird and watery after freezing and thawing. Not worth it.
If you are meal prepping lunches, I like making a couple different sandwiches at once so I do not get bored.
Nutritional Information and Health Benefits
Let us keep this realistic. A Japanese Egg Sandwich (Tamago Sando) is not a diet food, but it is also not junk. Eggs give you protein and important nutrients like vitamin B12 and choline. The bread gives you carbs for energy, and the mayo adds fat that helps it feel satisfying.
To make it a bit lighter, you can:
Use one less yolk and add an extra white, or use a little less mayo and add a teaspoon of plain yogurt. You can also choose a softer bread that is not super thick.
For most people, this is a balanced, comforting lunch, especially when you pair it with fruit or a simple salad.
Common Questions
Can I make this without Kewpie mayo?
Yes. Use a good regular mayo and add a tiny pinch of sugar. If you want, add a few drops of rice vinegar or lemon juice for that gentle tang.
Why does my egg filling turn watery?
Usually it is from adding too much mayo too fast or mixing while the eggs are still warm. Cool the eggs fully and add mayo slowly.
Do I have to remove the crusts?
Nope. It just makes it feel more like the convenience store version. If you like crusts, keep them.
How do I get super clean cuts like 7-Eleven?
Wrap the sandwich tightly and chill it for 10 to 15 minutes, then slice with a sharp knife and wipe the blade between cuts.
How many eggs for two sandwiches?
I usually use 4 large eggs for two generously filled sandwiches, especially if I am trimming crusts.
A cozy little sandwich worth making again
If you have been chasing that convenience store texture, this Best Tamago Sando Recipe gets you very close with simple steps and the right mix. Keep the bread soft, mash the yolks until smooth, and do not drown it in mayo. If you want to compare methods, I also like reading Japanese Egg Sandwich Recipe (Tamago Sando) – Hungry Huy and Japanese Egg Sandwich (Tamago Sando) たまごサンド because they have great tips too. Try it once, tweak it to your taste, and I swear it becomes one of those go to lunches you make on repeat.
Print
Japanese Egg Sandwich (Tamago Sando)
- Total Time: 26 minutes
- Yield: 2 sandwiches
Description
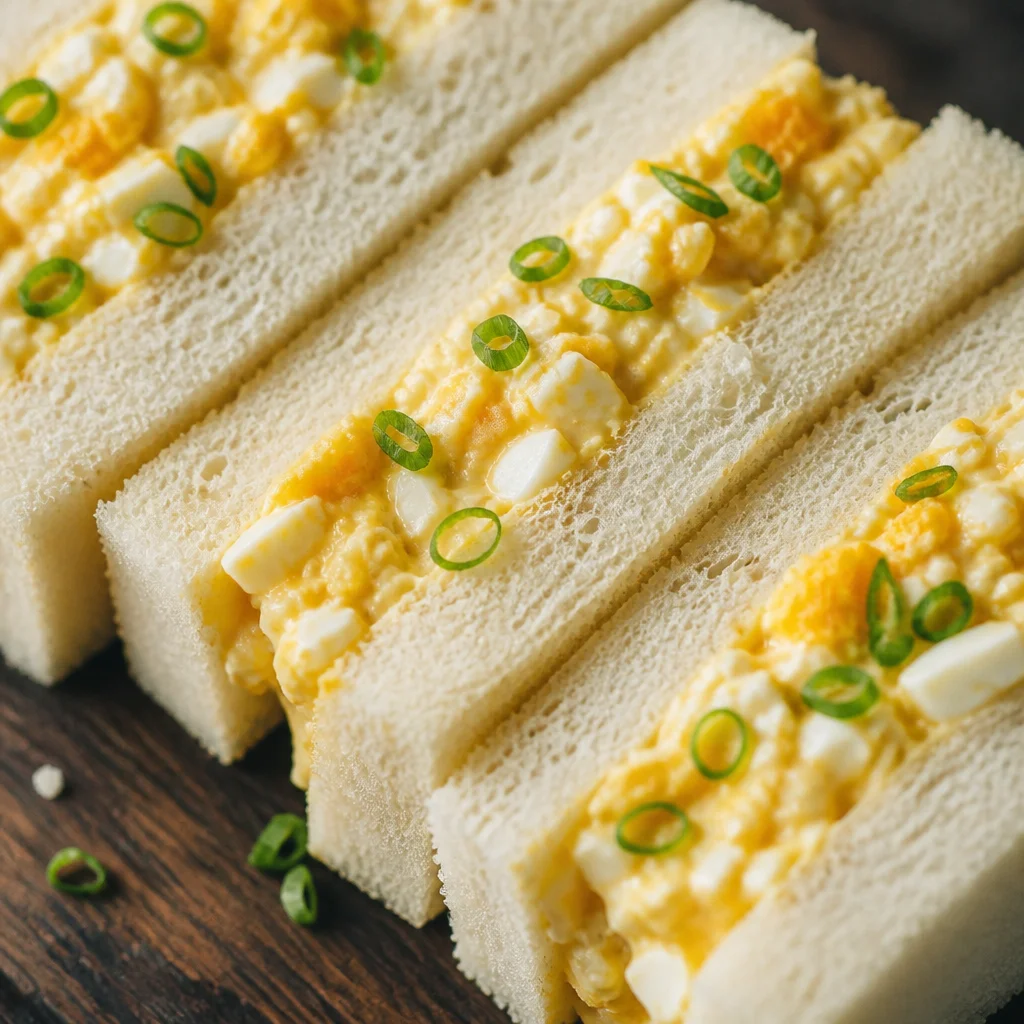
A creamy and fluffy Japanese egg sandwich made with soft bread, perfectly boiled eggs, and Kewpie mayo, inspired by convenience store versions.
Ingredients
For the Egg Filling
- 4–6 large eggs Eggs (large, depends on how many sandwiches you want) (Use eggs that have been in the fridge for a week for easier peeling.)
- 3 tablespoons Kewpie mayo (or the best mayo you have) (Kewpie mayo provides a richer flavor.)
- 1 teaspoon Salt (To taste.)
- 1 pinch White or black pepper (White pepper is more traditional.)
- 1 teaspoon Sugar (Optional, but adds sweetness.)
For Assembling the Sandwiches
- 4 slices Soft white bread (shokupan if possible) (Use the softest white sandwich bread available.)
- 1 tablespoon Butter (softened, optional) (Lightly buttering the bread can enhance flavor.)
Instructions
Preparation
- Put eggs in a pot and cover with cold water by about an inch.
- Bring to a gentle boil, then lower the heat to a simmer for about 10 to 11 minutes for hard-boiled eggs.
- Move eggs to a bowl of ice water for at least 5 minutes to stop cooking and make peeling easier.
Making the Filling
- Peel the cooled eggs and pat them dry.
- Separate yolks from whites and place yolks in a bowl.
- Mash yolks until smooth, then mix in Kewpie mayo, salt, pepper, and sugar.
- Finely chop the egg whites or mash them gently, then fold them into the yolk mixture.
Assembling the Sandwich
- Spread butter on one side of each slice of bread.
- Add a thick, even layer of egg filling on the unbuttered side of one slice.
- Top with the other slice, press lightly, and chill for 10 minutes if you want cleaner slices.
- Trim crusts if desired, then cut in half.
Notes
To adjust the texture, mash yolks until smooth and be cautious with the mayo. Chill the filling before assembling for a cleaner look.
- Prep Time: 15 minutes
- Cook Time: 11 minutes
- Category: Breakfast, Lunch, Snack
- Cuisine: Japanese


