There was a moment this week when the sunlight slid across the wooden board and I decided to make bread. The dough in this recipe shows up like a friendly, slightly wild thing bubbly, soft, with a satin sheen. Beginners Sourdough Bread Recipe: High Starter Method sits quietly in that sweet spot where effort meets reward.
If you like simple experiments with big payoff, you might also enjoy a quick, savory flatbread I made recently, like this cottage cheese flatbread that browns up fast.
Table of Contents
Why This Dish Caught My Eye
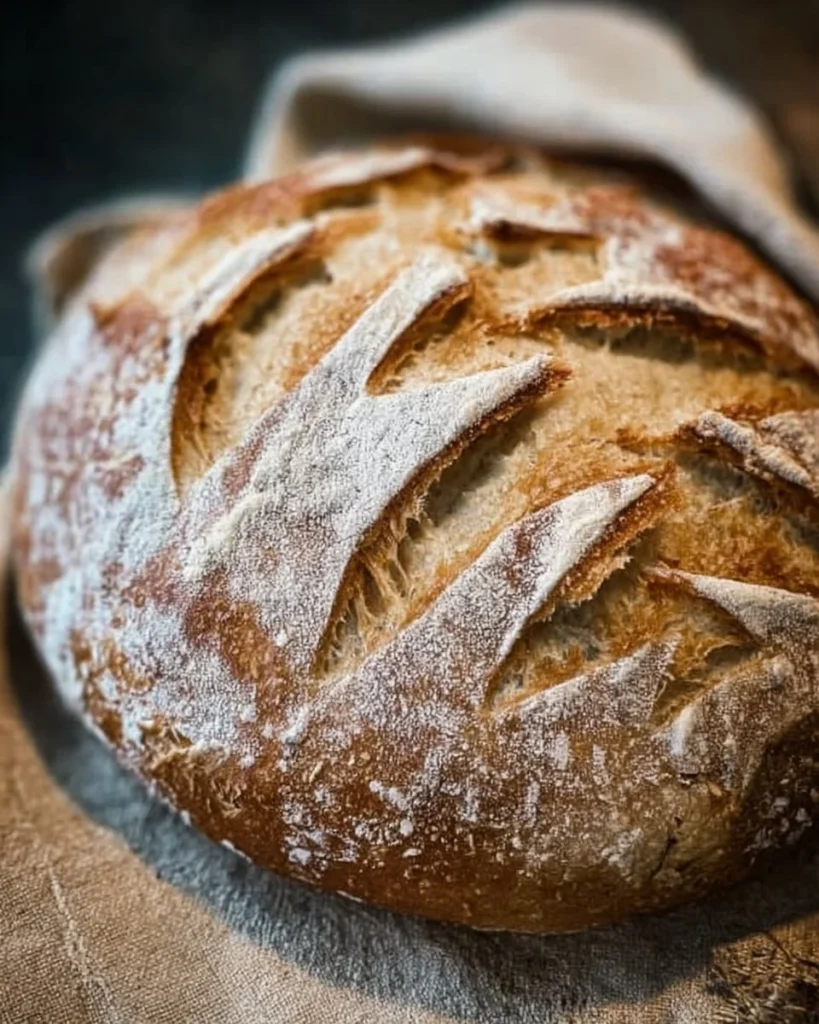
It is the color first. A pale, glossy dough that turns golden and dimpled in the oven. Then the texture. The crust wants to crack just a little. The inside keeps a soft, tearable crumb that feels alive in your hands.
There is contrast, too. A crisp top with soft, open air pockets when you pull a slice. Little flour dustings that look like frost. I noticed the way the dough moved when I folded it. It felt promising. And yes, this part matters.
How the Recipe Unfolds
This is calm work. No timers screaming every five minutes. You start with a lot of starter and let time do the rest. The dough is wet at first. It gets firmer, silkier, kinder to your hands after every set of folds.
You will fold, rest, fold, rest. Repeat until the dough takes on a softly rounded shape. Then chill, score, and bake in a hot dutch oven. The method is simple. It rewards patience. If you want a salty, cheesy partner for a loaf, try this cheesy garlic bread sometime.
Ingredients to Have Ready In Your Kitchen
2 cups Active Sourdough Starter (400 grams) (active and bubbly, made from equal parts flour and water), 3 cups Sifted All-Purpose Flour (360 grams), 1 cup Warm Water (240 grams), 1.5 teaspoons Salt (≈9 grams)
Bringing this loaf Together With Easy Steps
1-In a large mixing bowl (not metal), add 2 cups (400 g) of 100% hydration active sourdough starter. For an active starter, feed it and keep it out of the fridge for at least 4 hours, or overnight, until bubbly. Add 1 cup warm water and whisk until well combined with the starter. Add 3 cups sifted flour (sift or fluff the flour before measuring so it isn’t too compact) and 1½ teaspoons salt (Himalayan pink salt works well). Mix with a large spoon until a wet, biscuit-like dough forms.
2-Cover the shaggy dough with a clean damp kitchen towel and let it rest in a warm place for about 2 hours, or in a warm oven (about 80°F / 27°C) for about 1 hour.
3-First stretch and fold: Uncover the dough. With wet hands, pick up one side of the dough and fold it over the other side. Turn the bowl 90 degrees and repeat 4–6 times by stretching and folding all sides of the dough.
4-Cover with a clean towel or plastic wrap and let the dough rise for about 45 minutes, or until doubled in size.
5-Second stretch and fold: Uncover the dough, wet your hands, then repeat the stretch-and-fold process 4–6 times while rotating the bowl. The dough will start becoming more bread-like. Cover again and let it rise until doubled.
6-Third stretch and fold: Uncover the dough, wet your hands, and repeat the stretch-and-fold process 4–6 times, rotating the bowl each time. The dough will now feel smoother and stronger. Cover and let it rise again until doubled.
7-Fourth stretch and fold: Uncover the dough, wet your hands, and repeat the stretch-and-fold process 4–6 times. The dough should now feel fluffy and elastic.
8-Shape the dough into a round loaf. Dust a towel or proofing basket generously with flour and place the dough inside. Dust the top lightly with flour and cover with a clean towel.
9-Place the dough in the refrigerator and let it chill and rise for 4–8 hours.
10-Preheat the oven to 400°F (200°C) and place your Dutch oven inside the oven to preheat.
11-Cut a 2-foot piece of parchment paper and place it on the counter. Gently turn the chilled dough onto the parchment paper.
12-Using a very sharp knife or razor, score a design into the top of the dough.
13-Carefully remove the hot Dutch oven from the oven. Lift the dough into the Dutch oven using the parchment paper (it’s fine if the parchment hangs over the sides) and cover with the lid.
14-Bake at 400°F (200°C) for 25 minutes with the lid on. Remove the lid and bake for another 25 minutes until golden brown.
15-Let the bread cool before slicing and enjoy.
Serving Ideas That Feel Natural and Flexible
Tear a warm slice and spread salted butter. Simple. Or serve with olive oil and flaky salt. Sandwiches work well here. Thick slices, roasted veggies, a smear of mayo. Also great with quick soups.
If you want to make a crunchy, cozy snack, try melting cheese between two slices and grilling it like a wing of comfort think garlic bread grilled cheese; it pairs well with slices from a fresh loaf. garlic bread grilled cheese
Keeping Leftovers for Later
Wrap the loaf in a clean tea towel and tuck it into a paper bag if you plan to eat it the next day. It breathes and the crust keeps a little crisp. For longer storage, slice and freeze in a resealable bag. Toast straight from frozen.
If it goes stale, toast slices, then rub with garlic and drizzle with olive oil. That brings it right back.
Small Details That Matter and Tips That Help
Use a bowl that gives the dough room to move. Nonmetal helps the starter stay warm and active. Wet your hands before folding. You will notice the dough stops clinging so much.
I learned this the hard way: if your starter is not bubbly, the dough will be sluggish. Feed it and wait. Also, scoring matters. A shallow, confident cut makes a prettier oven spring than a nervous deep slash.
A clean damp towel for covering keeps the dough from forming a crust while it rises. And yes, flouring the proofing basket is worth the little cloud of dust.
Prep Tips That Help Saving Time
Do the flour sifting and measure your salt the night before. Keep tools in one place. When you’re ready, you will move quickly and without fuss.
If mornings are busy, make the dough the night before and chill it longer. The slow, cold rise helps flavor. For breakfast ideas that use day-old bread in creative ways, check this high protein breakfast bowls. You might be surprised how well bread fits into the plan.
5 Easy Variations You Can Try Right Now
- Add a handful of whole grains to the dough for nuttier flavor.
- Fold in a few chopped olives and rosemary before shaping.
- Swap half the flour for bread flour for a chewier crumb.
- Sprinkle seeds on top after brushing with water for texture.
- Make small boule rolls instead of one large loaf; reduce bake time by about 8 minutes.
Keep it simple. Pick one small change and see what happens.
Choosing the Right Pan or Dish
A heavy-bottomed dutch oven gives the best oven spring. The lid traps steam and makes the crust glossy. If you do not have one, use a roasting pan and add a small tray of hot water to create steam. Dark pans brown faster. Lighter pans give a paler crust.
Shape and color matter. A round, well-shaped loaf looks cozy. A long loaf fits sandwiches. Choose what feels right.
Questions That Come Up
Q: How do I know my starter is active?
A: It bubbles and doubles after a feed. Tiny holes appear. It smells pleasantly tangy, not sharp.
Q: My dough is sticky. Is that wrong?
A: Wet dough is normal here. Wet hands help. Resist the urge to add too much flour early on.
Q: Can I shorten the refrigerator time?
A: You can, but chilling improves flavor and handles the timing. Four hours is the minimum I use.
Q: How do I get big holes inside the bread?
A: Let the dough rest and handle it gently. The folds help build structure without knocking all the air out.
Q: Can I bake without a dutch oven?
A: Yes. Use a baking stone and add steam with a tray of boiling water, but the oven spring may be milder.
A Thought Before You Go
Bread makes the kitchen feel honest. It does not need fuss. Let light and time do half the job. Make one thing slowly this week. Watch it change. Share it with someone who notices.
For a step-by-step alternative and visuals, I like the clear walkthrough at Beginner’s Sourdough Bread (With Video) | The Perfect Loaf which complements this method. If you want a beginner-friendly primer that covers starter basics, this guide is helpful: Sourdough Bread: A Beginner’s Guide – The Clever Carrot.
Thanks for reading. Ask a question in the comments if you want help with a step.
Print
Beginners Sourdough Bread
- Total Time: 4 hours
- Yield: 8 slices
Description
A simple and rewarding recipe for making bubbly, golden, and crusty sourdough bread, perfect for beginners.
Ingredients
Main Ingredients
- 2 cups Active Sourdough Starter (400 grams) (Active and bubbly, made from equal parts flour and water.)
- 3 cups Sifted All-Purpose Flour (360 grams) (Sift or fluff your flour before measuring.)
- 1 cup Warm Water (240 grams) (Warm water helps activate the starter.)
- 1.5 teaspoons Salt (≈9 grams) (Himalayan Pink Salt recommended.)
Instructions
Preparation
- In a large mixing bowl (not metal), add 2 cups of active sourdough starter.
- Add 1 cup warm water and whisk till well combined with the starter.
- Add 3 cups sifted flour and 1.5 teaspoons salt. Mix together using a large spoon to form a wet, biscuit-like dough.
- Cover the dough with a clean damp kitchen towel and let it rest in a warm place for 2 hours.
Folding Steps
- After 2 hours, uncover the dough and perform the first stretch and fold by picking up one side of the dough and folding it over on top of the other side. Rotate the bowl 90 degrees and repeat 4-6 times.
- Cover and let the dough rise for 45 minutes or until doubled in size.
- Repeat the stretch and fold process for a second, third, and fourth time, allowing the dough to rise and double in size each time.
Shaping and Chilling
- After the final fold, shape your dough into a round loaf and place it in a floured proofing basket.
- Cover it with a clean towel and refrigerate for 4-8 hours.
Baking
- Preheat your oven to 400°F (200°C) and preheat your dutch oven inside.
- Gently turn the chilled sourdough out onto parchment paper, score the top with a sharp knife.
- Place the dough into the hot dutch oven and cover with the lid.
- Bake covered for 25 minutes, then remove the lid and bake for another 25 minutes until golden brown.
- Let cool before slicing and enjoy.
Notes
Wrap leftovers in a clean tea towel for next-day use. For longer storage, slice and freeze in a resealable bag. Toast straight from frozen if it goes stale.
- Prep Time: 50 minutes
- Cook Time: 50 minutes
- Category: Breakfast, Snack
- Cuisine: American


