Key Lime Pie Mason Jars (No Bake) are my little secret weapon for those days when I want something sweet and creamy, but I do not want to turn on the oven or deal with slicing a whole pie. If you have ever volunteered to bring dessert and then realized you also have to fit it in a crowded fridge, this one is for you. These jars feel fancy, but they are honestly simple. You get that bright lime flavor, the buttery crumb, and the fluffy filling in neat little layers. Plus, everyone gets their own jar, which means no messy serving drama.
Table of Contents
Ingredients for Key Lime Pie Mason Jars
This is one of those recipes where the ingredient list is short, but each item really matters for the final flavor. Here is what I use most of the time.
- Graham cracker crumbs (about 1 1/2 cups)
- Melted butter (about 5 tablespoons)
- Sugar (1 to 2 tablespoons for the crust, optional)
- Cream cheese (8 ounces, softened)
- Sweetened condensed milk (1 can, 14 ounces)
- Key lime juice (about 1/2 cup)
- Lime zest (1 to 2 limes, to taste)
- Whipped topping or whipped cream (about 2 cups)
- Pinch of salt (tiny, but it helps)
You will also want 6 to 8 small jars. I like 8 ounce mason jars, but any little glass cup works.
And just a quick side note since we are talking lime: if you are in a lime mood lately, my summer self lives for a cold drink like this easy watermelon lime slush. It is such a good pairing with creamy desserts.
Best Ingredients & Substitutions for Perfect Flavor
Let us keep it real. Sometimes you cannot find key limes, or you do not want to buy a whole bag for a half cup of juice. Regular lime juice works totally fine. The taste is slightly different, but still bright and delicious.
Here are my go to swaps when life happens:
Graham crackers: You can swap in vanilla wafers, digestive biscuits, or crushed shortbread. Shortbread makes it taste a little more buttery and rich.
Cream cheese: Full fat gives the best texture. Reduced fat works, but it can be a bit softer in the jar, especially if it sits out.
Whipped topping vs whipped cream: Whipped topping is stable and easy. Fresh whipped cream tastes amazing, just do not overwhip it or it turns grainy.
Key lime juice: Bottled key lime juice is a great shortcut. Just check it is 100 percent juice and not a sweet lime drink mix.
One more lime related thing I keep in my fridge a lot is a simple dressing like this easy cilantro lime Greek yogurt dressing. Not for the pie obviously, but if you are zesting limes anyway, it is nice to use the rest up during the week.
How to Make Key Lime Pie Mason Jars Step-by-Step
I make this in three easy chunks: crust, filling, then layering. The whole thing takes maybe 20 minutes, and then your fridge does the rest.
1) Make the crumb crust
Stir graham cracker crumbs with melted butter and a little sugar if you like it sweeter. The texture should look like damp sand and hold together when you pinch it.
Spoon about 2 to 3 tablespoons into each jar and press it down with the back of a spoon. You do not need to pack it like concrete, just enough to make a base.
2) Mix the creamy lime filling
In a bowl, beat the softened cream cheese until smooth. Add sweetened condensed milk and mix again. Then pour in the key lime juice and lime zest plus a pinch of salt. The mixture will thicken as you mix. That is the magic moment.
Fold in whipped topping or whipped cream gently. This keeps it airy and gives that fluffy pie vibe.
3) Layer and chill
Spoon or pipe the filling over the crust. I usually do a generous layer, then add a tiny sprinkle of crumbs on top, then another small dollop of filling if I am feeling fancy.
Cover and chill for at least 2 hours, but overnight is even better. The flavor settles and the crust firms up a bit.
This is the part where I always sneak a taste off the spoon. No regrets.
Pro Tips for the Best No Bake Key Lime Pie Jars
These little jars are forgiving, but a few details take them from good to the kind of dessert people text you about later.
Use softened cream cheese: If it is cold, you will fight lumps. I set mine out for about 30 to 45 minutes.
Do not skip the zest: The zest is where that fresh lime smell comes from. It makes the jars taste brighter, not just sour.
Chill long enough: The filling needs time to set. If you serve too soon, it is more like pudding in a jar. Still tasty, just softer.
Keep the crust crumbly: Too much butter makes it greasy. If it looks wet, add a few extra crumbs.
Variations of Key Lime Pie in a Jar
Once you have the basic Key Lime Pie Mason Jars (No Bake) idea down, you can play around a lot.
Coconut key lime: Add a handful of toasted coconut between layers.
Strawberry lime: Add diced strawberries on top or between the crust and filling.
Chocolate crust: Use chocolate cookie crumbs instead of graham crackers.
Extra tangy: Add a little more lime juice and zest, but do it gradually and taste as you go.
Mini party size: Use tiny jars or shot glasses for bite size desserts at a BBQ.
Serving Ideas for Mason Jar Desserts
These jars are already cute, so you do not need much. But if you want them to feel extra special, here are a few easy ways.
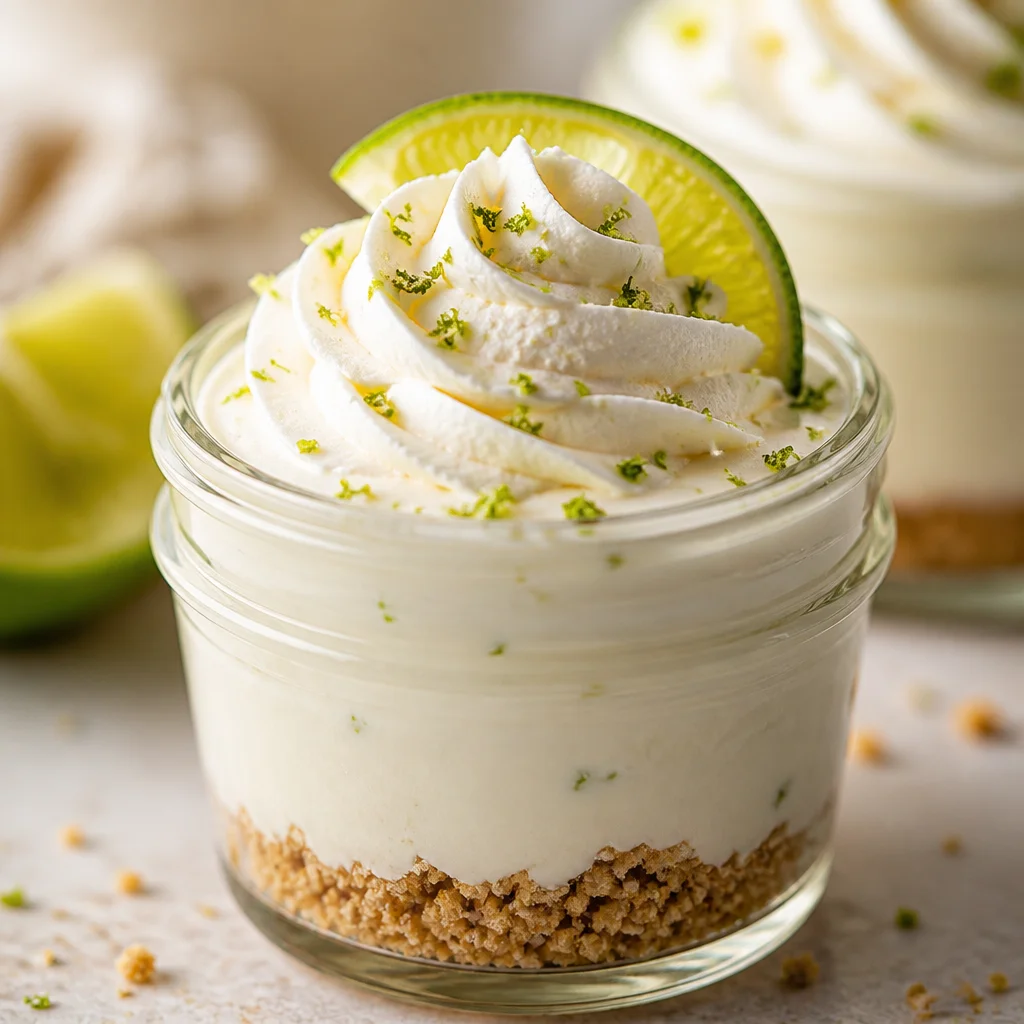
- Top each jar with a swirl of whipped cream and a thin lime slice
- Add a sprinkle of extra crumbs for a little crunch
- Serve with fresh berries on the side
- Pair with a light dinner so dessert is the star
If you are planning a full meal, I love something fresh and lime friendly beforehand like cilantro lime steak bowls. Then these jars feel like the perfect cool finish.
Make Ahead and Storage Tips
This is one of my favorite make ahead desserts because it actually gets better after a night in the fridge. For the best texture, I make them the evening before and serve them the next day.
Fridge: Keep covered and store for up to 3 days. After that, the crust can start to soften too much.
Freezer: You can freeze them, but the texture changes a little when thawed. If you do freeze, freeze without fresh whipped cream on top and add topping after thawing.
Separate components: If you want the crunchiest crust, store crumbs separately and assemble a few hours before serving.
How to Transport and Serve Dessert Jars
If you have ever tried to drive with a pie on your lap, you already know why jars are such a win. Screw on the lids, line them up in a cooler bag, and you are set.
My simple transport routine:
Chill first: Cold jars are sturdier and less likely to slosh around.
Use a tray: Put jars on a rimmed baking sheet so you can move them in one trip.
Add toppings later: If you are doing fancy whipped cream swirls, do that when you arrive.
Nutrition Information and Portion Control
I am not a calorie counter day to day, but I do like knowing what I am getting into. These are rich because of the cream cheese and condensed milk, so a small jar feels satisfying.
What affects the numbers most:
Jar size: An 8 ounce jar is usually plenty for most people.
Crust thickness: More crumbs plus butter adds up fast.
Whipped topping: Homemade whipped cream can be heavier than store bought topping depending on how you make it.
If you want a lighter option, make smaller jars and focus on a thicker lime flavor so it still feels like a treat.
Common Mistakes to Avoid with No Bake Key Lime Pie
I have made these enough times to mess them up in a few different ways, so you do not have to.
Lumpy filling: Usually from cold cream cheese. Beat it smooth before adding anything else.
Runny jars: Not enough chilling time, or too much lime juice. Measure the juice and chill properly.
Bitter taste: Too much zest, or you zested into the white part under the peel. Only zest the bright green layer.
Soggy crust: Too much butter or storing too long. Keep crust ratio balanced and aim to eat within a few days.
Expert Tips for Perfect Layered Dessert Jars Every Time
This is the part that makes people think you spent way more effort than you did.
Use a piping bag or zip top bag: Spoon filling into a bag, snip the corner, and pipe clean layers.
Wipe the jar edges: If filling smears the sides, wipe with a paper towel for that bakery look.
Tap the jars gently: A light tap helps the filling settle and removes air pockets.
Repeat thin layers: Two thinner layers look prettier than one big blob, and you get more crust in each bite.
For a fun dinner before dessert, I like something cozy that does not compete with the lime, like crockpot cheddar chicken pot pie tortellini. Comfort meal, bright dessert. Always a good combo.
Creative Toppings and Garnish Ideas
Toppings are where you can really make Key Lime Pie Mason Jars (No Bake) feel personal. I rotate these depending on my mood and what I have around.
Lime zest curls: Quick and classic.
Crushed graham crackers: Adds crunch and makes it look finished.
White chocolate shavings: Sweet and pretty with the green zest.
Toasted coconut: Beachy and warm.
Fruit: Raspberries, blueberries, or thin strawberry slices.
Pinch of flaky salt: Sounds odd, tastes amazing with sweet lime.
More Easy No Bake Dessert Recipes to Try
If you love the vibe of easy, cold desserts that you can make ahead, you are in a good place. Key Lime Pie Mason Jars (No Bake) are my go to when I want something that feels like a treat but does not require baking or fancy tools.
Other no stress ideas I keep in my back pocket are pudding parfaits, icebox cakes, and yogurt fruit cups. And if you are planning a summer spread, add something fresh on the side like fresh fruit salad with honey lime bliss. It fits the lime theme and makes the table look colorful.
Common Questions
Can I make these without key lime juice?
Yes. Regular lime juice works great. If you want that key lime vibe, bottled key lime juice is the easiest shortcut.
How long do the jars need to chill?
At least 2 hours, but overnight gives you the best set and the best flavor.
Can I make Key Lime Pie Mason Jars (No Bake) in plastic cups?
Totally. For parties, plastic cups are lighter and easier to transport. Just keep them cold.
What size jars should I use?
I like 8 ounce jars for a real dessert portion. For tasting tables or parties, 4 ounce jars are perfect.
Why did my filling get too thin?
Usually it is from not chilling long enough or adding extra lime juice without adjusting. Measure the juice and give it time to set.
A Sweet Little Sign Off (And a Nudge to Make Them)
If you need a dessert that feels sunny and fun, these Key Lime Pie Mason Jars (No Bake) are the one. They are creamy, tangy, and honestly so satisfying straight from the fridge. If you want to compare another version, I found great inspo from No Bake Key Lime Pie Jars – Mix & Match Mama, and this one is also a helpful read for extra tips on jar desserts, Mini No-Bake Key Lime Pie in a Jar – easy dessert recipe. Make a batch, stash them in the fridge, and you have dessert ready whenever the craving hits. If you try them, I hope you go heavy on the lime zest and take that first cold bite slowly. It is the best part.
Print
Key Lime Pie Mason Jars
- Total Time: 2 hours
- Yield: 8 servings
Description
Delicious and easy no-bake Key Lime Pie Mason Jars that offer a creamy and tangy dessert without the need for baking. Perfect for serving individual portions with a delightful lime flavor and buttery crumb layer.
Ingredients
For the crust
- 1.5 cups Graham cracker crumbs (You can substitute with vanilla wafers, digestive biscuits, or crushed shortbread.)
- 5 tablespoons Melted butter (Be careful not to add too much as it can make the crust greasy.)
- 1–2 tablespoons Sugar (Optional for a sweeter crust.)
For the filling
- 8 ounces Cream cheese (Must be softened to avoid lumps.)
- 14 ounces Sweetened condensed milk (One can.)
- 0.5 cups Key lime juice (Regular lime juice can be substituted.)
- 1–2 limes Lime zest (Use to taste.)
- 2 cups Whipped topping or whipped cream (Fresh whipped cream can be used but shouldn’t be overwhipped.)
- pinch Salt (Enhances the flavor.)
For serving
- 6–8 Small jars (8 ounce mason jars work perfectly.)
Instructions
Make the crumb crust
- Stir graham cracker crumbs with melted butter and sugar if desired. The texture should look like damp sand.
- Spoon about 2 to 3 tablespoons into each jar and press down with the back of a spoon.
Mix the creamy lime filling
- In a bowl, beat softened cream cheese until smooth.
- Add sweetened condensed milk and mix again.
- Pour in key lime juice and lime zest plus a pinch of salt. Mix until thickened.
- Gently fold in whipped topping or whipped cream.
Layer and chill
- Spoon or pipe the filling over the crust in each jar.
- Cover and chill for at least 2 hours, preferably overnight.
Notes
Use softened cream cheese to avoid lumps. Don’t skip the zest for a brighter flavor. Chill the jars long enough for the filling to set properly. You can create variations like coconut key lime or strawberry lime.
- Prep Time: 20 minutes
- Category: Dessert, No Bake
- Cuisine: American


