Salami and Cheddar Beach Snacks are my go to answer for that moment when you are already packing towels, sunscreen, and a speaker, and then someone says, “Wait, what are we eating?” I have been there so many times, usually standing in front of the fridge with the door open like it will magically hand me a plan. These snacks are simple, salty, cheesy, and they actually hold up outside better than a lot of fussy options. You can make them fast, you can make a bunch, and they make everyone feel like you tried (even if you threw them together in ten minutes). Let me show you exactly how I do it.
Table of Contents
Essential Ingredients for Salami and Cheddar Snacks
I like keeping this recipe super practical. It is basically a small sandwich situation, but built for sandy hands and hungry people. If I have these basics, I can pull it off even when my kitchen is half chaos.
- Salami: sliced, not too thick
- Cheddar cheese: slices or thick shreds you can tuck in
- Bread: rolls, slider buns, or sturdy sandwich bread
- Something creamy: mayo or hummus (optional but helpful)
- Something crisp: lettuce or cucumber if you want freshness
If you are also doing snacks for a group, I like adding one “fun” extra to the cooler so it feels like a beach spread. This is where I steal ideas from kid friendly snack roundups, like easy fun summer snacks for kids and parties. It is a lifesaver when you need one more thing that is not chips.
Choosing the Best Cheddar, Salami, and Bread
This part matters more than people think because heat and travel can make average ingredients taste kind of sad.
Cheddar: I usually grab sharp cheddar because it tastes bold even when it is cold. Medium cheddar works too, but sharp gives you that punch that makes the whole bite feel “snacky” in the best way. If you can, buy it in a block and slice it yourself. Thicker slices melt slower and do not get as sweaty in the bag.
Salami: Look for a salami you already like eating straight from the fridge. I tend to go with genoa or hard salami. If it is super greasy, it can make the bread soggy faster, so I avoid anything that looks overly oily.
Bread: Sturdier is better. Soft white bread can work, but it smushes easily in a beach bag. I love small rolls, slider buns, or even focaccia style bread if I have it. If you want a sandwich vibe that feels extra but is still easy, this burrata Italian focaccia sandwich recipe is great inspiration for bread choices and layering.
Optional Extras: Lettuce, Mayo, Hummus, and Toothpicks
Optional extras are where you can make Salami and Cheddar Beach Snacks feel a little more “put together” without adding real work.
Lettuce: If you use it, pick something sturdy like romaine. I skip delicate greens because they wilt fast.
Mayo: A thin swipe on the bread adds flavor and acts like a moisture barrier. Sounds small, but it helps. If mayo makes you nervous in the heat, pack it separately and add it right before eating.
Hummus: Hummus is my favorite swap when I want something that feels a bit fresher. If you like that combo, you might also love these deliciously simple cucumber and hummus bites as a side snack in the cooler.
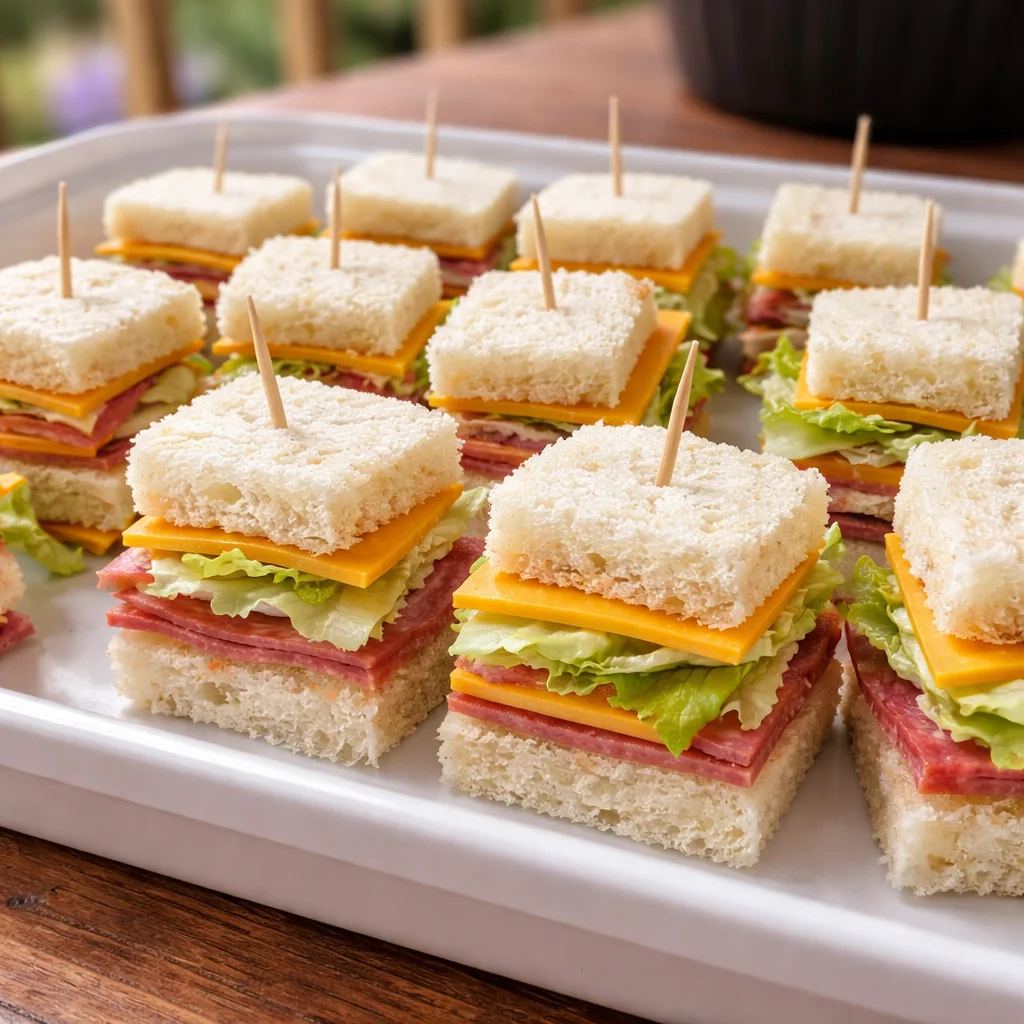
Toothpicks: Toothpicks are low key the secret weapon. One toothpick through the center keeps everything from sliding around, especially if you are doing smaller stacks or little triangles. Also, they make the snack feel party ready.
Quick and Simple Step-by-Step Sandwich Assembly
I keep the assembly line super basic. This is not the time for complicated steps. If you can stack things, you can make these.
Here is how I assemble them:
1) Lay out your bread and keep the tops and bottoms paired so you do not lose track.
2) Add a thin layer of mayo or hummus if using.
3) Place cheddar first so it sits flat and covers the bread a bit.
4) Add salami next, folding slices if you want height and texture.
5) Add lettuce if using, then close the sandwich.
6) Slice into halves or quarters if you want smaller portions.
7) Add toothpicks if you are packing them for travel or serving to a group.
If I am making a bigger batch, I build all bottoms first, then add cheese to all, then salami to all, and so on. It is faster and you do not end up with one sad sandwich and one overstuffed monster by accident.
Time-Saving Tips for Busy Hosts and Parents
If you are juggling kids, guests, or just a general rush to get out the door, this is the part you will care about most.
My favorite shortcuts:
Buy pre sliced cheddar when you are short on time. Thick slices are ideal, but pre sliced is totally fine.
Use slider buns so you can make a dozen quickly and they fit in containers neatly.
Pack components if needed like bread and fillings separate, then assemble at the beach. This keeps bread from getting soggy.
Set a 12 minute timer and only make what you can in that time. You will be surprised how many you can knock out fast.
Also, do not underestimate the power of one more easy handheld option when everyone is extra hungry. If you want something warm for a pre beach lunch at home, I have made this basil ranch chicken and bacon quesadilla and it disappears fast.
Delicious Variations for Parties and Kids’ Snacks
The classic version is salami plus cheddar plus bread, but you can tweak it depending on who you are feeding. I do this all the time because someone always has a preference.
Fun variations I actually use:
Pizza style: Add a thin smear of marinara and a pinch of Italian seasoning. Keep it light so it does not soak the bread.
Sweet and salty: Add a super thin layer of honey mustard. Sounds odd, tastes amazing.
Pickle crunch: A couple pickle chips tucked in give it that deli vibe.
Kid simple: Just cheddar and salami, no sauce, cut into little squares with toothpicks.
Wrap version: Use tortillas, roll up salami and cheddar, then slice into pinwheels.
If you are doing a party tray, you can mix shapes and sizes so it looks like more effort than it was. Halves, quarters, pinwheels, and little stacks all on one platter looks fun and keeps people grabbing.
Pairing Salami and Cheddar Snacks with Drinks and Sides
Salami and cheddar are rich, so I like pairing them with things that are crisp, cold, or juicy. It keeps everything from feeling too heavy in the sun.
Drink ideas:
Cold lemonade, iced tea, sparkling water with citrus, or juice boxes for kids. If adults are involved, I still keep it simple because the beach is not the place for complicated drinks.
Side ideas:
Grapes, apple slices, baby carrots, pretzels, or a simple crunchy salad in a container. I also love bringing something cold and sweet that will not melt instantly, like easy frozen grapes and pineapple snack. It is basically the beach version of a dessert that also cools you down.
Making Snacks Portable: Perfect for Picnics and Pool Days
Portability is the whole point. I want these to survive the walk from the car, the blanket shuffle, and the cooler dig without turning into a mess.
How I pack them:
Use a flat container with a tight lid. Line it with paper towels to catch extra moisture. Stack sandwiches in a single layer if possible. If you have to layer, put parchment paper between layers so they do not stick together.
Cooler tip that really helps: Keep the sandwiches in the middle of the cooler, not right on top of the ice. If bread touches wet ice packs, it can get damp. I usually do ice packs on bottom, a towel or another container as a buffer, then sandwiches.
And if you are worried about sand, pack napkins and a few wet wipes. It is not a food tip exactly, but it makes the whole snack moment way more enjoyable.
How to Store Salami and Cheddar Snacks for Maximum Freshness
These are best the day you make them, but you can still store them smartly if you are prepping ahead.
If you are making them a few hours ahead: Assemble fully, wrap each piece tightly in plastic wrap or parchment, and store in the fridge. Keep any wet extras like tomatoes separate.
If you want to prep the night before: Slice cheese and portion salami, then keep everything in separate containers. In the morning, assemble fast. This is the best way to avoid soggy bread.
Food safety note from my real life experience: At the beach, I follow the simple rule of keeping them chilled and not letting them sit out forever. If the cooler is doing its job, you are fine. If it is blazing hot and the snacks have been sitting out a long time, I do not push it. When in doubt, toss it. Salami is more forgiving than some meats, but I still play it safe.
Common Questions
1) Can I make Salami and Cheddar Beach Snacks without bread?
Yes. Roll salami around cheddar sticks or cubes, then secure with toothpicks. It is clean, fast, and great for gluten free friends.
2) What is the best cheddar for hot weather?
Sharp cheddar holds flavor well when cold and travels nicely. Thick slices or small cubes tend to do better than super thin slices.
3) How do I keep the bread from getting soggy?
Use a barrier like mayo or butter, keep juicy ingredients out, and pack them tightly wrapped. Or assemble on site if you can.
4) Are these okay for kids who are picky?
Totally. Keep it simple with just salami and cheddar, then cut into small squares. Toothpicks make them feel like fun finger food.
5) Can I freeze them?
I do not recommend freezing fully assembled sandwiches because the bread texture gets weird. Freeze the bread alone if needed, then assemble fresh.
A Little Beach Snack Pep Talk Before You Go
If you try this once, you will see why I keep coming back to it. Salami and Cheddar Beach Snacks are easy to make, easy to pack, and they hit the spot when everyone is hungry and sun tired. If you want another take on the idea, I also enjoyed reading Salami and Cheddar Beach Snacks – The Tipsy Housewife because it feels like swapping notes with a friend. And if you are building a whole cooler menu, My Favorite Simple Beach Snacks | Kiersten Hickman has more simple picks that make beach days smoother. Now pack the cooler, grab the sunscreen, and go enjoy your snack break in the sun.
Print
Salami and Cheddar Beach Snacks
- Total Time: 10 minutes
- Yield: 4 snacks
Description
Quick and easy snacks perfect for beach outings, these Salami and Cheddar Beach Snacks are portable, tasty, and can be made in just ten minutes.
Ingredients
Base Ingredients
- 8 slices Salami, sliced (Choose genoa or hard salami.)
- 8 slices Cheddar cheese, sharp (Can use thick shreds or slices.)
- 4 pieces Bread, rolls or slider buns (Sturdy options like small rolls or focaccia work best.)
Optional Ingredients
- 4 leaves Lettuce, sturdy type like romaine (Helps add freshness.)
- 4 tbsp Mayo or Hummus (Optional, acts as moisture barrier.)
Instructions
Assembly
- Lay out your bread, keeping the tops and bottoms paired.
- Spread a thin layer of mayo or hummus on the bread if desired.
- Place cheddar slices flat on the bread.
- Add salami, folding it if needed for height.
- Add lettuce if using, then close the sandwich.
- Slice into halves or quarters as preferred.
- Secure with toothpicks if packing for travel or serving.
Notes
Best the day they are made. Store in the refrigerator if prepared ahead and keep moist ingredients separate. For optimal freshness, prepare sandwiches close to serving time.
- Prep Time: 10 minutes
- Category: Appetizer, Snack
- Cuisine: American


